Wish to quicken the project? Select a fast-drying primer for the very first coat. Read the tag for details on recoating time and also to see to it the guide works with the paint you're intending to utilize. Pro Tip: Make use of an enamel underbody guide. Water-based paint has come a lengthy means, and also some premier acrylic alkyd hybrids rival oil-based paint.
Oil-based paint dries slowly and also levels well - kitchen cabinet painters. This provides you more operating time as well as less brush marks. Likewise, when they're dry, oil-based guides like Benjamin Moore Clean Slate Enamel Underbody sand quickly to supply a perfect base for your coating layer.
3 out of 5 Moderate Though it's just repaint, getting the brushwork right takes some time as well as perseverance. Drill/driver Paint scraper Putty knife Shop vacuum cleaner with drywall-dust filter Random orbit sander Nylon-Polyester chisel-tip Paint brush - 2 1/2- Inch Safety and security safety glasses respirator fitted with organic vapor containers Chemical-resistant handwear covers If your kitchen closets are strong however outdated and dark, a fresh coat of paint can go a long way towards changing the area without draining your checking account.
What Does How To Paint Kitchen Cabinets With Knots - Addicted 2 Diy Mean?
" You do not need to spray to get a smooth finish," states painting contractor John Dee, who has actually dealt with a variety of This Old Residence TELEVISION jobs. cabinet painters las vegas. He frequently brush-paints closets anyway due to the fact that it provides him more control and also prevents the risk of paint spray finishing up where it's not desired.
Yet the result is a resilient, glass-smooth surface that's the equal of anything from a spray gun. "You just need to make use of the most effective products and put in the time to sand as well as do the brushwork right," Dee says. Keep reading for our tips for paint kitchen cabinets. Prior to beginning a cooking area paint work, empty the cabinets, erase the counters, and also eliminate freestanding appliances.
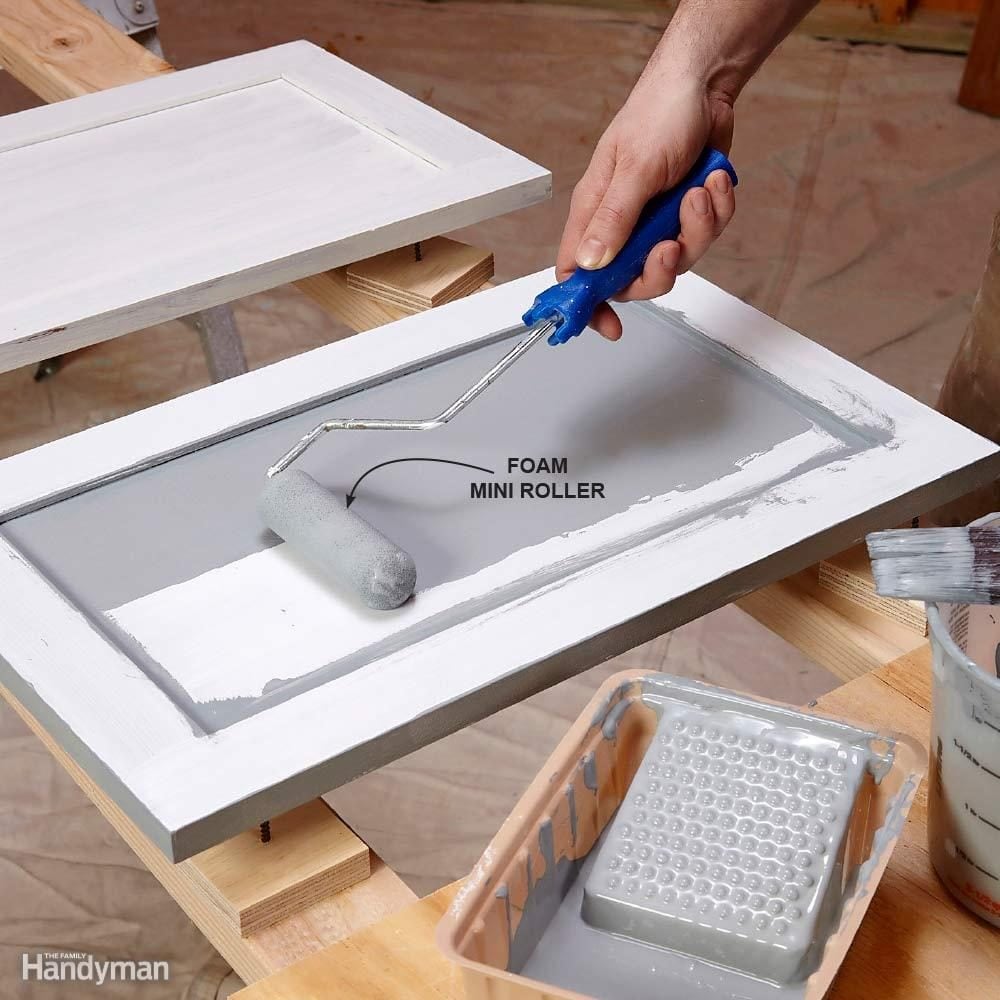
Tape rosin paper over the counter tops and flooring, and also tape plastic sheet over the backsplash, windows, taken care of appliances, and also interior entrances (to shield the remainder of the house from dirt and fumes). Mask bizarre around the cupboards. Finally, set up a worktable for paint doors, drawers, as well as racks.
About Prep Your Cabinets To Paint - Seeking Lavendar Lane
" Old cabinets are covered with every little thing from hand oils to greasy smoke residue to petrified sauce," says Dee. "You've reached get all that off or the paint won't stick." Back out the joint screws from the cupboard structure and eliminate the doors. Functioning methodically from delegated right, top to base, tag every one with a phoned number item of tape.
Allot the shelf-hanging hardware. At your worktable, eliminate the pulls as well as joints and also save what's being reused. On the doors, move the number from the tape to the exposed wood under one joint. Cover it with fresh tape. Open up the windows for air flow as well as place on security equipment. Rub down every one of the face frameworks, doors, drawer fronts, and shelving with an abrasive pad dipped in liquid deglosser.
Before the deglosser evaporates, rapidly wipe away the residue with another tidy, deglosser-dampened cloth. If you're moving the hardware, fill the old screw holes with a two-part polyester wood or autobody filler. It embeds in about 5 mins, so blend only tiny sets. (Dee includes a pea-size little hardener to a golf-ball-size chunk of filler.) The filler reduces a little bit, so overfill the openings somewhat.
Rumored Buzz on The Painless Guide To Painting Kitchen Cabinets - Quicken ...

If it solidifies entirely, sand it smooth. Sand all surface areas with the grain using 100-grit paper (nagle cabinet painters). To ensure no littles dust mar the surface, vacuum the cabinets in and out, then massage them down with a tack fabric to catch any type of debris that the vacuum cleaner misses. Dee claims, "Hand sanding is the most effective strategy on oak since you can push the paper right into the open grain, which a power sander or sanding block will certainly miss out on." When utilizing a tack towel, unfold each brand-new fabric totally, down to one layer, after that crumple it to obtain the best dirt collection surface.
Yet they just penetrate open-grained woods such as oak, ash, mahogany, or hickory. Combing putty, the pudding-thick, oil-based covering Dee made use of on these oak cabinets, loads the grain as it primes the wood. A pair of caveats: It must be used with a good-quality nylon-polyester brush, which you'll have to throw out after each coat.
Starting on top of the cabinet, brush on the guide or brushing putty throughout the grain, then "tip off" pass the brush gently over the wet coating in the instructions of the grain. Always tip off in a single stroke from one end to the various other. Provide it a day to completely dry.
he has a good point